
What is Google Forms?
Google Forms is a free, flexible online survey tool that is hosted online by Google. It is free to use for anyone with a Google account (such as a gmail account), which is also free. Users can send their info without creating an account, and they can even modify their info later to correct categories, spellings, etc.
It is a useful tool for doing tournament sign-ups when a larger archery-specific tool like ArcheryEvents.com or Rcherz.com isn’t a good fit for your organization, due to complexity, time, or expense.
While it began life as a survey tool, Google Forms is flexible enough to be used for party invitations, online order forms, school exams, and event registration. It’s that last one that we’ll use for tournament sign-ups.
This is a Google Form that we put together for the 2017 North Region FITA Field Championship. It has some basic event information (that is also copied over on that event’s main web site page), and then it asks for simple sign-up information — name, contact information, gender, bow division, age class.
Google Forms has a lot of helpful videos on how to use it, and there are several “templates” for forms, which are a great place to start building your form.

I started with the Event Registration form, which arrives with several example questions already in it. You can use these as starting points for what kinds of prompts you would like to have on your form — fill-in-the-blank, multiple-choice, etc. You can make prompts be mandatory, or optional. You can duplicate existing questions if you want the same settings on the next question. You can move the order of the questions around until you’re happy with how it looks.
Or scrap it and start over. You can create and destroy as many as you need.
All changes are saved right away (and will immediately show up the next time a visitor fills out the form — so be careful with changes once people start filling it out).

But you should test it out, and see how the responses look before actually sending it out. Use the Preview button (it looks like an eyeball) to fill out your own form. If you don’t see the eyeball, make your browser screen wider, or click on the 3 vertical dots to open a menu that contains the Preview button.
Once you fill out the form, you can check how the responses look. I’ll go over response management later down this document, but Google Forms responses are pretty clear by default.
Once you’ve created a form (either from scratch, or from a template), it is live and ready to be used. You just need to send out the URL link to people. Then the responses start coming in! Use this Send button (it looks like a paper airplane) to get options to email your form’s location, copy/paste a link for your form, or embed your form inside an existing web page.
Steps
- Sign in to Google Account (your gmail may already be signed in, which is perfect)
- Go to Google Forms
- Select a template from the “Start a new form” section.
- This is your sign-up form.
- Change the new form’s title, background color, background picture, etc.
- Use the example questions as they fit what you need. Duplicate ones that you’re happy with for future questions. Delete the rest of the unneeded questions.
- Have a colleague double-check the form for sanity before sending it out to make sure it’s sufficient and not confusing. Two heads are better than one.
- Test responding to your own form using Preview
- Check your responses.
- Now you’re ready to Send it out and get back to Archery, where everything is easy and there are never any headaches…
Managing Responses (Basic) – Default settings
Once your Form is in place, you’ll need a way to see what info people respond with. At the top of your form, click on “RESPONSES”.  This is really good already, and pretty easy to see what’s going on. The responses can be viewed as a Summary or as Individual responses.

Click “Individual” to see the form how each person filled it out. This is one way you can see how each person signed up for the tournament. But the next way is event more convenient, and not particularly more difficult.
In this area there is also a switch labeled “Accepting responses”. When you want to disable your form, so that no one can enter more responses, click this switch. (you can turn it on again later if you want). 
You will receive an email whenever your Form gets a response.
Managing Responses (Intermediate) – Google Sheets
Instead of paging through individual registrations, it sure would be nice to have them all collected together, in something like a spreadsheet. Don’t worry, Google agrees with you. And it’s already built in.
In the Responses area, above the “Accepting responses” switch, there is a green button with lines on it. This is key to the next step.
 Clicking on that button will create a continually-updating link between your form responses and a spreadsheet in Google Sheets. (If you’re not familiar with Google Sheets, it’s a free online spreadsheet tool hosted by Google, just like Google Forms.)
A box opens where you can link to a new spreadsheet (which is usually the best thing to do) or link to one that you’ve already created.
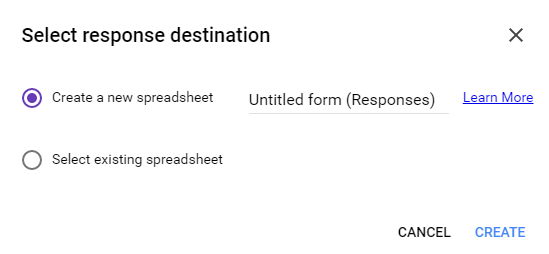
Create a new spreadsheet. Over at http://sheets.google.com/, a new spreadsheet shows up that holds the responses to your form. There is a column for every question on your form. Any responses you receive from now on will be posted into this spreadsheet.
Because each row in the spreadsheet corresponds to a response in the Forms “Responses” section, there is some trickiness if you delete a response or remove a spreadsheet row without also doing the other one.
As your data rolls in, you can start setting up your event using this spreadsheet data. This data can be copy/pasted into Excel or another spreadsheet program, if you prefer working with those.
This new Sheet will be private, viewable only by you. You can share it with other event admins. Google Sheets can be made public to the world, but as these have people’s private info in them, don’t do that. (There’s a better way, explained below).
This is enough to run your event. If you’re not familiar with spreadsheet formulas and web page programming, stop now. If you’re a geek, or would like to become one, continue.
Managing Responses (Advanced)
Personally, I think that a proper event registration system should do these basics:
- Make it easy to do individual sign-ups — no accounts required.
- Show how many slots are available.
- Easily export the sign-up data.
- Public option to show who has signed up for which categories and sessions.
- Cut-off signups automatically once the session limit has been reached.
and hopefully these advanced features:
- Sign up groups or families.
- Allow users to edit their information to correct categories, etc.
So far, we have Google Forms doing 1-3. Now we’re going to do #4. The Kung-Fu step is #5.
Over on the web page for the North Region FITA Field event., we have a display of who is signed up for the event. That’s a Google Chart, pulling the data from Google Sheets, being collected by the Google Forms. Astute readers will recognize a theme here. Because it’s Google’s chart library, you can do column sorting, scrolling, and other groovy things for free.

All it takes is pinning together a couple of tools to get the data flowing. I wanted to get the Google Forms data posted to the ITAA web site. So I needed to link a series of tools that could each move the data one step closer. Here is the path:
- Google Forms manages the live link into Google Sheets.
- Google Charts is a javascript library with a api to query Google Sheets as though they were mini SQL databases.
- The ITAA web site is a WordPress site, so it’s running on PHP and javascript. We should be able to use Google Charts’ js API.
- But by default WordPress isn’t super helpful at letting you add the necessary js headers to individual pages.
- Fortunately, the WordPress community of plugin developers has created the solution called “Per Page Add to Head“. That lets me insert custom code into the <head> tag of just the post I’m working with. This is perfect for inserting the js scripts.
So the data flows like this: Forms -> Sheets -> javascript -> WordPress Post
With the Per Page Add To Head plugin enabled, I get an “Add to head” box in my wordpress post. I’ve added this script to it to load the event’s data out of the Google Sheet. I modify that script to use the URL for the Google Sheet that holds all of the response information.
Then any <div> I add with the chart_div id defined in the script is replaced by a Table-type Google Chart populated with data from my Google Sheet.
So the bottom of my post has this div:
<div id=”chart_div”>Folks already registered:</div>
Done – the data flows!
Data Privacy!
Except for too much data was flowing. Google Charts can only pull data from public Google Sheets. And I don’t want to post my archers’ phone numbers to the public Internet. So there’s a few extra steps.
Public-Private Partnership
Google Charts can only pull data from a public Sheet, but your own Google Sheets can pull data from each other. So I created a public Sheet that pulls only some of the data from my private Sheet, using the importRange formula for Google Sheets.
Here is what my Public Sheet looks like (It’s public, take a look):

Only A1 and B1 have anything in them. The formulas in them are array formulas that import whole data ranges from the private Sheet.
(Troubleshooting — if you get an REF! error, just insert one of these importrange statements by itself in the sheet. Then click on that cell. Google Sheets will give you an option to LINK the two sheets together. This is the magic step that is critical to this succeeding. Then you can delete that cell’s formula and proceed with the full filter formulas)
The formulas look heavy, but they’re just doing 3 simple things at once. Let me break them down:
In A1, we have this:
=filter( importrange(“1gYotTPuCw6ePRtUZuYTlOr-MYbl6333mRYmns5K-28w”, “Form Responses 1!B:B”),
not(isblank(importrange(“1gYotTPuCw6ePRtUZuYTlOr-MYbl6333mRYmns5K-28w”, “Form Responses 1!B:B”))),
left(importrange(“1gYotTPuCw6ePRtUZuYTlOr-MYbl6333mRYmns5K-28w”, “Form Responses 1!k:k”),7)<>”SCRATCH” )
Gibberish — Where does the “1gTotT…” etc come from? That is the unique identifier for the private response Sheet. Copy it from the URL of that sheet into your formula here in the public Sheet. Paste it in all three parts of the formula. (Maybe in the future I’ll make that less redundant…)
importrange brings in an array of data from another Sheet, identified by the jumbled string of characters. That’s the same identifier as the URL of that other Sheet. Then I specify which worksheet inside the Sheet I want to pull data from, and which columns. <jumble>, worksheetName!column:column.
filter operates on that data array, and throws out any data items that don’t pass the designated true/false test criteria. So, filter( SomeDataArray, criteria1, criteria2, …)
In this case, I want to throw out any blank rows. importrange has a habit of importing -every- row, which can be 500-1000 extra blank rows. I don’t want those on my web page. So the first criterium is to check that same imported column A (so I importrange it again), and only keep things that are not(isblank(stuff)).
I also want an easy way to mark which archers are scratches, and should be removed from the tournament. Because the Forms and Sheets get tricky when I delete rows, I’d rather not mess myself or others up. I’d prefer to just add a column (K, in my case) to the private Sheet where we can write “SCRATCH”, and the display will skip showing them. So this second criterium imports column K, and throws out any rows whose column K starts with “SCRATCH”.
In B1, I have nearly the same thing.
=filter( importrange(“1gYotTPuCw6ePRtUZuYTlOr-MYbl6333mRYmns5K-28w”, “Form Responses 1!F:H”),
not(isblank(importrange(“1gYotTPuCw6ePRtUZuYTlOr-MYbl6333mRYmns5K-28w”, “Form Responses 1!F:F”))), left(importrange(“1gYotTPuCw6ePRtUZuYTlOr-MYbl6333mRYmns5K-28w”, “Form Responses 1!k:k”),7)<>”SCRATCH” )
The only difference is that here I’m importing data from columns F through H to show on the web site (columns B,C,D,E,I,and J are private data, and remain private)
This formula still checks for blank rows, and still checks for SCRATCH.
This way the public Sheet only has data in it that I want displayed on the web page, and the Google Chart code can be simpler.
That code has a 200 row limit in it from my previous attempts to solve this importrange filtering problem. You could also modify the imported data inside the javascript itself, too. But I like spreadsheets better.
Managing Responses (Kung-Fu Master)
Now we have a proper tournament registration system. But for tournaments with several sessions, there’s nothing that will limit sign-ups to the capacity of the session. Now we can add that.
Note: I’ve gotten this working on a test form, but I’ve never tried in in the real world, yet. But it should be awesome.
The key to this step is a plugin written for Google Forms called FormRanger. This plugin lets you populate and modify available answers in your Google Form from data in a Google Sheet. This is useful for exams, A/B testing, surveys, and for us. Because you can use your Reponses Sheet to modify the Form. Which is all the data you need to make changes to available sessions as soon as the session becomes full.
A helpful individual has created a public slideshow on how to use FormRanger to help you do this.
Form Ranger – Limit Responses slideshow.
There is also a plugin to Google Forms called Choice Eliminator that would also do a lot of this, however, that plugin has been having stability problems, and is due to be removed for redevelopment in Q1 of 2017.
Using this presentation, I was able to set up a Form that will switch a session to “Waiting List” as soon as it is full. This lets people continue signing up with confidence, and lets them specify if there is a session they want to wait for.
I’m also considering using FormRanger to display how many spaces are still available in a session. That will be useful, but mostly for indoor season.
Note – changing responses
One of my favorite features about Google Forms is that it doesn’t require a password account for people to send info. But you can enable an option that lets people change their responses after they submit them — to correct names, bow categories, etc. If you want to allow this, enable the “Edit after submit” checkbox in the Settings menu (that button looks like a gear).
Once the user submits information, they are presented with an option to “Edit your response”. They can edit their info now, but if they -save- that link, they can edit it in the future, as well. Users can only edit their own responses.
You must be logged in to post a comment.